Android: Asteroids Game

For my android class game project I decided to create a simplified version of the Asteroids game using Android Studio and Java. I had never created any game before so not only this was my first android game it was my first game ever! I had about 3-4 week of part-time weeks to develop this app so my main focus was to get the requirements in on time. In this post I will go through the main parts of the code.

The app is available in Google Play Store:

The code is available on GitHub at:

At a high level,

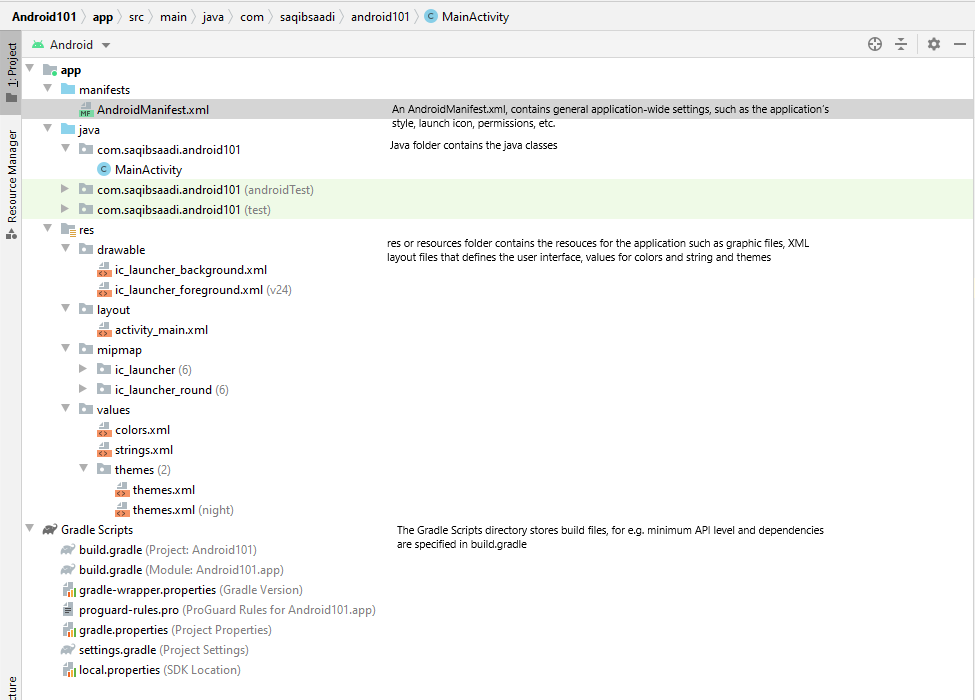
  • MainActivity.java – contains initialization code and also the GameView class that extends the SurfaceView
  • GameController.java
    • manages background music and image
    • creates instances of asteroids
    • provides methods to start/stop the game
    • keeps track of game being active/inactive
  • SpaceShip.java
    • manages the spaceship and bullet resources
    • the firing of the bullet sound and the ship explosion sound
    • the ship explosion animation
  • Asteroid.java
    • manages speed and movements of an asteroid
    • manages the sound resource used when an asteroid is hit
    • keeps the current count of hits before the asteroid explodes

The drawMe method of the GameView class is where all the drawing on the canvas happens. When the game is launched a game over screen is displayed with the option to start a new game as shown below

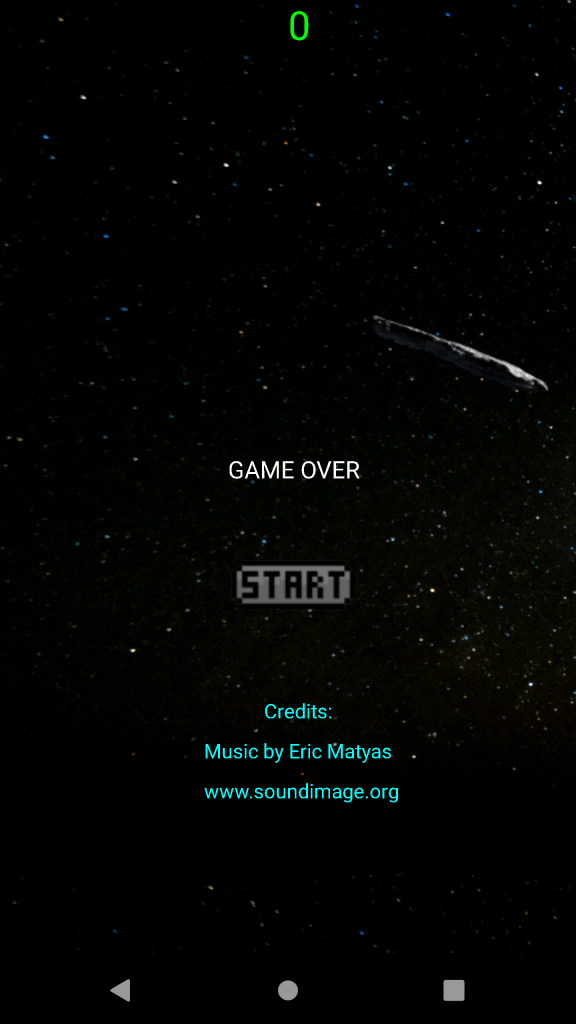
The drawMe method is being called constantly as soon as the app is started. Once different elements of the game are created they are not destroyed, they are simply hidden from the screen, for e.g. when the game is not active the spaceship is not rendered. When the start button is clicked, the startGame() method of the GameController class is called that sets the isActive flag to true. The drawMe method checks for gameController.isActive() and draw appropriate items.

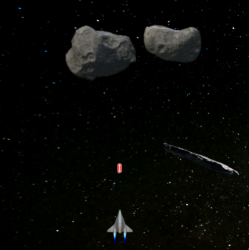
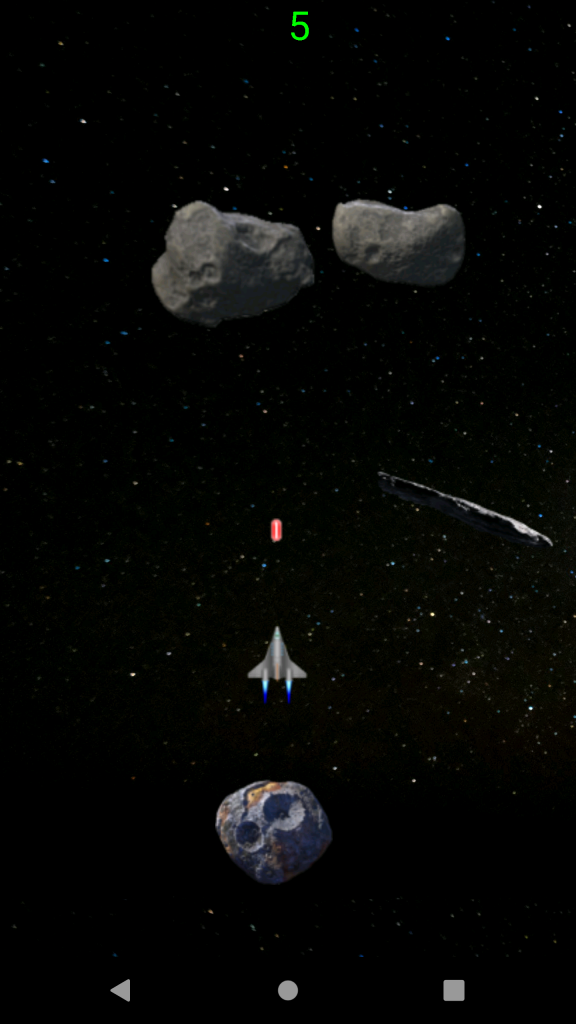
When the game is active, the spaceship is visible and fires a bullet while asteroids moves according to the move direction they were assigned at the time of creation. When asteroids are created, the are assigned a move speed and a move direction at random and when an asteroid is hit, it disappears from the screen and reenters the screen after a fixed time with a randomly chosen speed and direction.

Collision Detection

Two types of collision are of concern here

  • Asteroid hit by the bullet
  • Asteroid hit the spaceship

In order to detect collision, each of these three elements (spaceship, bullet and asteroid) carry a rectangle area as they move. While drawing the asteroid, intersect() method of the asteroid is call to check if the rectangle around the asteroid intersected with either the rectangle around the bullet or with the rectangle around the spaceship. This intersection indicates a collision. If an asteroid is hit by the bullet and the number of hit an asteroid could take before exploding has reached, there is a bang sound played and an image is displayed. If an asteroid hit the spaceship, a different bang sound is played and an animation is ran to show the explosion.

The Bullet

Space ship class has the code to create the bullet and also fire the bullet. The fireLaserBullet() method is called by the drawMe method constantly as long as the game is active. A bullet is created if there isn’t one on the screen already. The bullet moves up until it leave the screen or if it hits an asteroid. In both cases that bullet is recreated.

Recreation in this case doesn’t not mean the bullet object is destroyed and recreated. It simply mean making it reappear at the top of the spaceship to give an illusion that the spaceship has fired another bullet.

    public void fireLaserBullet(){
        // if asteroid was hit, remove the bullet from the screen
        if (asteroidHit){
            bulletTop = Constants.SPACE_SHIP_BULLET_OFF_SCREEN_Y_OFFSET;
            bulletCreated = false;
            asteroidHit = false;
            return;
        }
        if (bulletCreated) {
            // move bullet up until it's out of the screen
            bulletTop -= Constants.SPACE_SHIP_BULLET_MOVE_UP_SPEED;
            if (bulletTop < 0){
                bulletCreated = false;
            }
        }
        else {
            // create bullet
            if (this.displayShip) fireSound.start();
            bulletLeft = left+Constants.SPACE_SHIP_BULLET_CREATE_X_OFFSET;
            bulletTop = top-Constants.SPACE_SHIP_BULLET_CREATE_Y_OFFSET;
            bulletCreated = true;
        }

        rectBulletF.top = bulletTop - Constants.SPACE_SHIP_BULLET_RECT_Y_OFFSET;
        rectBulletF.left = bulletLeft;
        rectBulletF.right = this.bulletLeft + this.laserBullet.getWidth();
        rectBulletF.bottom = this.bulletTop - Constants.SPACE_SHIP_BULLET_RECT_Y_OFFSET + this.laserBullet.getHeight();
    }

The Spaceship

Besides handling the bullet, the spaceship class has code to handle spaceship hit by an asteroid and also display the animation on collision. The animation is composed of explosion images that are stored in explosionBitmaps array.

    public void shipHit(){
        shipExplodedSound.start();
        startExplosionAnimation();
        renderExplosion = true;
        displayShip = false;
    }

    private void startExplosionAnimation() {
        Timer explosionAnimationTimer = new Timer();
        explosionAnimationTimer.scheduleAtFixedRate(new TimerTask() {
            @Override
            public void run() {
                if (explosionRenderedIndex >= explosionBitmaps.size()) {
                    renderExplosion = false;
                    explosionRenderedIndex = 0;
                    explosionAnimationTimer.cancel();
                }
                else {
                    explosionBitmap = explosionBitmaps.get(explosionRenderedIndex);
                }
                explosionRenderedIndex++;

            }
        }, Constants.SPACE_SHIP_EXPLOSION_ANIMATION_TIMER_DELAY, Constants.SPACE_SHIP_EXPLOSION_ANIMATION_TIMER_PERIOD);

    }

The shipHit() method is called when the collision is detected that starts the sound and the animation. It also sets the render explosion flag to true and display ship to false. The startExplosionAnimation() method runs a timer task at fixed intervals to swap the explosion image (explosionBitmap) being rendered.

The Asteroid

Besides asteroid image, the Asteroid class has these specific variables that makes each asteroid behave a little differently from each other.

  • Speed – A randomly assigned value that makes asteroid moves at different speed
  • Number of hits to explode – Number of hits a asteroid could take before exploding
  • Movement – A randomly assigned move direction upon asteroid creation that determines how the asteroid would move on the screen. There are three supported move directions defined by the enum MoveDirection
    • VerticalDown – asteroid moves vertically from top to bottom either from left to right or right to left. Once it leaves the screen the direction is reversed and it moves vertically in the opposite direction. This continues until the asteroid is hit.
    • HorizontalDown – asteroid moves horizontally from left to right or right to left while moving down every time it leaves the screen. Once it leaves the screen either from the top or the bottom, the direction is reversed.
    • Diagonal – asteroid moves diagonally on the screen. When it leaves the screen the direction is reversed.
  • Entry location – A randomly assigned location where an asteroid enters the screen.

Besides asteroids movement, there is code to that handles what happens when an asteroid is hit.

    public void hit(){
        if (hitCount >= numHitsBeforeExploding) {
            renderExplosion = true;
            bangLarge.start();
            startExplosionAnimationTimer();

            // hide asteroid
            this.displayAsteroid = false;

            // Re-enter asteroid in 5 seconds
            enableDisplayTimer.schedule(new TimerTask() {
                @Override
                public void run() {
                    hitCount = 0;
                    setRandomEntryLocation();
                    setRectF();
                    moveDirection = MoveDirection.getRandomDirection();
                    setMoveSpeed();
                    displayAsteroid = true;

                }
            }, Constants.ASTEROID_REENTER_TIMER_DELAY);
        }
        else  {
            hitCount++;
        }
    }

    private void startExplosionAnimationTimer() {
        Timer explosionAnimationTimer = new Timer();
        explosionAnimationTimer.schedule(new TimerTask() {
            @Override
            public void run() {
                renderExplosion = false;
            }
        }, Constants.ASTEROID_EXPLOSION_HIDE_TIMER_DELAY);

    }

When the asteroid is hit, a bang sound is play and renderExplosion is set to true to display an explosion image. In order to keep the UI continue to display the explosion image for a little while, a timer is used that starts after a certain delay and sets the renderExplosion to false which makes the images to no longer be rendered by the UI. The asteroid object is not destroyed, it’s simply hidden. Another timer is used to reenter the asteroid on the screen but with different parameters. When the asteroid reenters the screen, it’s assigned a reentry location at random, move speed at random and move direction at random.

That was it for the main parts of the application. To see the game in action and the code in a little more details watch the following video.

Android 101

IDE

Android Studio is the official Android development tool available here

Project Structure

Common components

Open a layout file such as the activity_main.xml. Hide the project view and select “Split” mode to show the design and code at the same time.

Palette – contains available controls/widgets that we can drag onto the “design editor”

Component Tree – The component tree provides a visual overview of the hierarchy of the user interface design. Selecting an element from the component tree will cause the corresponding view in the layout to be selected. Similarly, selecting a view from the device screen layout will select that view in the component tree hierarchy

Controls

TextView with language translations (no audio)

Android : Making REST API Calls

For a project I had to figure out how to make an http GET call and handle the JSON data. This would have been a little easier if my experience was in Java application development but most of my experience have been in C#/.NET. This post goes step by step from creating a new Android Project to getting the data back and deserializing it and then displaying it. However, displaying or fancy UI is not really the focus of this post.

Technologies and tools used:

  • Android Studio 4.1.2
  • Volley – an Http library for Android Apps available on GitHub
    • A Note from the guide… “Volley is not suitable for large download or streaming operations, since Volley holds all responses in memory during parsing. For large download operations, consider using an alternative like DownloadManager.”
  • Gson – library to convert Java Objects JSON
  • Bing Maps Local Search API returns a list of business entities centered around a location or a geographic region
  • Postman to test the API calls

Here we go…

Bing Maps

  • Have access to the API key unless you don’t need one. In this case have request Bing Maps API key from https://www.microsoft.com/en-us/maps/create-a-bing-maps-key

Postman

  • Let’s first make sure we have a working API call in postman. Download postman or use their web version and create a new request similar to this:
    • GET https://dev.virtualearth.net/REST/v1/LocalSearch/?type=EatDrink&userCircularMapView=38.835960,-121.266700,3219&key={{key}}
    • Note: the above url uses a variable ‘key’ that I have created in postman to hold the Bing Maps API key
    • If you are not creating a variable then provide the key value directly in the URL without {{}}
  • Send the request.
Make sure to get a valid response before proceeding

Android

  • Create a new Android project using Empty Activity template
  • Add a reference to volley and gson libraries to the list of dependencies inside your Module build.gradle script
dependencies {

    ...
    implementation 'com.android.volley:volley:1.2.0'
    implementation 'com.google.code.gson:gson:2.8.6'
}
You will get a notification to sync the project, go ahead and click Sync Now
  • You will get a notification to sync the project, go ahead and click Sync Now
  • Create classes for the response we received in the postman. These class will be used to convert the JSON response into Java Object. There are a few online sites available that makes this task a lot easier. I used http://www.jsonschema2pojo.org/ for the following reasons:
    • You can specify the package name so that the new classes get the same package name as in the Android package
    • You can specify the class name of the root class that becomes the root of the response
    • You can specify the annotation style. Since we have are using gson library already, I have opted to go with the Gson annotation.
My options
  • Click the Zip button and a link will be generated to download the file. Download and extract the content of the zip file. Select all file and copy (Ctrl+C)
  • Paste them in in the same folder as the MainActivity.java class
  • Hover over the red texts in the code and you should get an option to import missing packages. In some cases you will get multiple options, make sure to select the correct package. This is how it looked once all references were resolved
All references resolved
  • Add the following lines in AndroidManifest.xml file to get permissions to perform network operations
    <uses-permission android:name="android.permission.INTERNET" />
    <uses-permission android:name="android.permission.ACCESS_NETWORK_STATE" />
  • Store Bing Maps API Key as a string resource in strings.xml file under res/values folder
Add api key as string resource
  • In the MainActivity.java class create a new method, I’m calling it bingMapsLocalSearch(). The code below explains the details of the code
private void bingMapsLocalSearch(String type, Double latitude, Double longitude) {

    // API Key is stored as a string resource in strings.xml. We have to use getString method as R.string.bingMapsApiKey returns a number
    String apiKey = getString(R.string.bingMapsApiKey);

    // Default values for testing
    if (type == null) type = "EatDrink";
    // TO-Do: need to get coordinates from phone location
    if (latitude == null) latitude = 38.835960;
    if (longitude == null) longitude = -121.266701;

    // user location
    String userLocation = String.format("%f,%f", latitude, longitude);
    // Max results. Currently Bing Maps API support up to a max of 25 records
    String maxRes = "25";

    // API url for bing maps local search
    String url = String.format("https://dev.virtualearth.net/REST/v1/LocalSearch/?type=%s&userLocation=%s&maxRes=%s&key=%s", type, userLocation, maxRes, apiKey);

    // Instantiate the RequestQueue. Our request will be sent to this queue
    RequestQueue queue = Volley.newRequestQueue(this);

    // Create the request
    GsonRequest<LocalSearchResponse> gsonRequest = new GsonRequest(url, LocalSearchResponse.class, null,
            new Response.Listener<LocalSearchResponse>() {
                @Override
                public void onResponse(LocalSearchResponse response) {
                    // At this point we are just logging a success message to the console
                    System.out.println("Success");
                }
            }, new Response.ErrorListener() {
                @Override
                public void onErrorResponse(VolleyError error) {
                    // At this point we are just logging a failure message to the console
                    System.out.println("Fail");
                }
            });

    // Add the request to the RequestQueue.
    queue.add(gsonRequest);
}
  • Now add a call to this method from onCreate of the MainActivity class
    • bingMapsLocalSearch(null, null, null);
  • Set breakpoints at both the println lines and debug. If all pieces of the puzzle are in place you should get a http 200 OK response.
OK Response
  • Next we will create UI to make use of the data returned in the response. Since this post is not about the UI, I’ll keep it simple and just have a list view control to shows a list of business returned from this hard-coded api call (recall the coordinates are fixed values). Later on we will create controls to get that data either from phones location or have it entered on the UI.

UI

  • Create a view that looks something like this
  • Here is code for that
<?xml version="1.0" encoding="utf-8"?>
<androidx.constraintlayout.widget.ConstraintLayout xmlns:android="http://schemas.android.com/apk/res/android"
    xmlns:app="http://schemas.android.com/apk/res-auto"
    xmlns:tools="http://schemas.android.com/tools"
    android:layout_width="match_parent"
    android:layout_height="match_parent"
    tools:context=".MainActivity">

    <TableLayout
        android:layout_width="match_parent"
        android:layout_height="match_parent">

        <TableRow
            android:layout_width="match_parent"
            android:layout_height="match_parent">

            <TextView
                android:id="@+id/appLabelTextView"
                android:layout_width="371dp"
                android:layout_height="wrap_content"
                android:ems="10"
                android:inputType="none"
                android:text="@string/app_label"
                android:textSize="18sp" />
        </TableRow>

        <TableRow
            android:layout_width="match_parent"
            android:layout_height="match_parent" >

            <com.google.android.material.textfield.TextInputLayout
                android:layout_width="match_parent"
                android:layout_height="wrap_content">

                <com.google.android.material.textfield.TextInputEditText
                    android:id="@+id/cityStateEditText"
                    android:layout_width="match_parent"
                    android:layout_height="wrap_content"
                    android:hint="Enter City, State" />
            </com.google.android.material.textfield.TextInputLayout>
        </TableRow>

        <TableRow
            android:layout_width="match_parent"
            android:layout_height="match_parent" >

            <Button
                android:id="@+id/searchButton"
                android:layout_width="249dp"
                android:layout_height="wrap_content"
                android:onClick="searchButtonOnClick"
                android:text="@string/search_button_label" />
        </TableRow>

        <TableRow
            android:layout_width="match_parent"
            android:layout_height="match_parent">

            <ListView
                android:id="@+id/searchResultsListView"
                android:layout_width="match_parent"
                android:layout_height="wrap_content" />

        </TableRow>

        <TableRow
            android:layout_width="match_parent"
            android:layout_height="wrap_content" >

            <View
                android:id="@+id/line1"
                android:layout_width="match_parent"
                android:layout_height="3dip"
                android:layout_weight="1"
                android:background="#5A5353"
                android:padding="2dip" />
        </TableRow>

        <TableRow
            android:layout_width="match_parent"
            android:layout_height="match_parent" >

            <TextView
                android:id="@+id/MSCopyrightTextView"
                android:layout_width="wrap_content"
                android:layout_height="wrap_content"
                android:ems="10"
                android:inputType="none"
                android:singleLine="false"
                android:textSize="14sp" />
        </TableRow>

    </TableLayout>
</androidx.constraintlayout.widget.ConstraintLayout>
  • Wire-up the controls in the main activity class. Note: call to the bingMapsLocalSearch is now triggered by the button click event.
Wire-up Controls
  • Create a method to load the list view control with the data received from the API. Here is the code for that. (Examine the response in postman or see Bing Maps API documentation for more details about the response)
private void LoadListViewData(LocalSearchResponse response) {
    List<ResourceSet> resourceSetList = response.getResourceSets();
    List<Resource> resources = null;
    ArrayList<String> businessNames = new ArrayList<String>();
    if (resourceSetList != null) {
        for (ResourceSet resourceSet : resourceSetList) {
            resources = resourceSet.getResources();
            break;
        }
    }
    if (resources != null){
        for (Resource resource : resources) {
            businessNames.add(String.format("%s %s", resource.getName(), resource.getPhoneNumber()));
        }
    }
    if (businessNames.size() > 0) {
        businessNames.add(0, String.format("%s resources found", businessNames.size()));
    }
    else {
        businessNames.add(0, "No resources found");
    }

    ArrayAdapter<String> itemsAdapter =
            new ArrayAdapter<String>(this, android.R.layout.simple_list_item_1, businessNames);
    searchResultsListView.setAdapter(itemsAdapter);
}
  • Call LoadListViewData method from bingMapsLocalSearch method when we have a successful response from the API call in the. So, find the line System.out.println(“Success”); and enter the following code below it
if (response.getStatusCode() == 200){
    // Display copyright information from Microsoft
    MSCopyrightTextView.setText(response.getCopyright());
    LoadListViewData(response);
}
  • Run program and click the Search button. If the api call was successful you should get some results and it should look something like this

That’s all for making a call to REST API and displaying the data. Obviously a lot of improvements could be done while still keeping the app very basic. I’ll leave it up to you to make it better 🙂